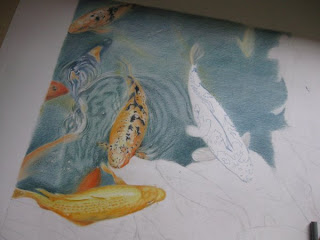
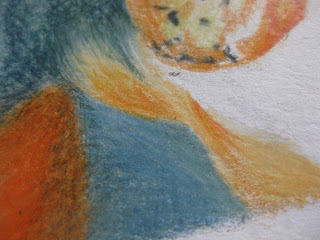
Another day, another bash at getting this drawing completed. In keeping with my wandering attention I decide to pay some to a tiny, light-coloured fish at the top of the drawing and (mostly) the surrounding water. Well, it has to be done, and I feel like using the blues and greens. So here goes...
I apply a layer of white (yes, Chinese - yawn!) to the area marked out for the little fish. It has a very light colour, really just whitish with a tinge of blue. I use prussian blue, a thin layer of primrose yellow which I subdue with more white, and then some sky blue and more white and blend them all together. A vague hint of light orange (chrome) suffices for around the nose area of the fish.
But the attention it will wander, so I start working on the surrounding water.
Sticking to the usual sequence of colours I apply a layer of spruce green, drawing in horizontal strokes and using the side of the pencil tip. Always make sure to keep the tips of the coloured pencils well-sharpened - this gives more surface to draw/shade with and also prevents the paper from getting scratched and dented by the wood of the pencil, as will happen if allowed to become blunt.

Taking the stumper I blend the colour into the paper using downward strokes. (This is a little difficult to see in the photo to the left, but there's, as yet, little pigment on the paper. However, it does help to even everything out).
Again, using horizontal strokes and the side of the pencil I make a layer of oriental blue over the previous layer.
The stumper is once more useful in blending the colours together in the same way. Notice how the whiter areas in the grain of the paper are beginning to fill with pigment.
Now I mix in a little orange chrome near the tail of a large fish to the left. There's just an impression of a fish swimming underneath in the depths of the water and a slight blend of orange will suffice to show this.
Drawing, like life, is one big experiment from which we learn as we go along, so not satisfied with the results after adding layers of colour one-by-one I get impatient and decide to apply the rest of the colours - juniper green, prussian blue and blue grey - on top of each other (all horizontally) without blending in between.
This is much more satisfying! Yes, here comes the Chinese white again - it's a tried and trusted device so why change tactics now?! After sharpening the white pencil once again (there'll be nothing left of it soon) I shade in strokes at an angle to the colour layer.
There's enough pigment now to blend the colours nicely together and achieve a much smoother surface. I will return to this again later to create even more depth.
There's a clear division between the water surrounding the small fish at the top and the water below, so this area will need lots more blending and more colour.
Time to sharpen the white pencil again. I really will have to invest in a bin! :-)
Using the white I make vertical strokes, dragging the colour from the top down into the paler area below.
Then, to further obscure the line between the two areas I re-apply all the normal sequence of colours to the whole area, blending them together with the stumper and more Chinese white, until the two areas become one homogeneous colour. Yay! We have water!
Time to move on to bigger fish - literally! It's very important to keep your drawing clean as you work. You'd be surprised how quickly a drawing can become grubby just from leaning on it with your arm. A great solution is to work with your hand resting on another clean sheet of paper - this protects the underlying drawing and prevents white areas from becoming smudged.
Of course, not being in the habit of always practicing what I preach (well, I never said I was perfect or had all the answers!) I forgot to do this this time. Oh well, there's always the eraser to resort to - and I do! I clean up inside the lines of a large Koi fish which is the next fish I'm going to draw. Don't be tempted to leave the cleaning and add colour on grubby paper - it
will show through and
you will be sorry!
With prussian blue I sketch in the outlines of the patches on the fish's back. Using light grey I add the shaded detail on the side fins. Things are moving along!
It's 1 hour and 15 minutes later (12 hours and 25 minutes in total) and this is the drawing so far - "water, water everywhere, nor any drop to drink"... definitely time for a nice cup of tea!


